Any questions about this guide can be directed to epbp.
1.1 – Account Creation
To be able to access an account on the IA website. You first need to register.
To sign up, fill out the form from this webpage: https://ia.mayflower-remade.com/register/
The password to the website is – given in the discord
Once you have filled out the form, a command member will approve your account and give you the correct roles you’re meant to have.
You might get an email confirming your account, if you do, be sure to confirm it. This lets command members only have to assign your roles.
1.2 – Account Creation (For Command)
To come soon
2.1 – Creating Case’s

- Find the button on the left called ‘Posts’.
- Click on the button ‘Add New Post’.

- Rename ‘Add Title’ to the case number
- Make sure ‘Visibility’ is set to ‘Public’
- Select the ‘Active’ category.
- Add the user who your doing a case on in the ‘Tags’ section. – Make sure to press enter; otherwise, it won’t save.
- **MOST IMPORTANT**
In the content permissions box, tick all the boxes however DO NOT TICK SUBSCRIBER

- Where it says ‘Type / to choose a block’
Start typing /case and select ‘Case Description’ seen to the left. - The template will then show up, and the rest to fill out is self-explanatory.

- At the bottom of the case template, there are some file boxes; these are used as evidence holders.
- Upload files of saved evidence to there and name them correctly.
- If you need fewer or more file boxes, click on one of the boxes and click the 3 dots.
- Then select either Duplicate or Delete
2.2 – Creating Disciplinary Notices
- Find the button on the left called ‘Posts’.
- Click on the button ‘Add New Post’.
- Rename ‘Add Title’ to the case number with -Notice at the end. e.g Case-0000-Notice
- Make sure ‘Visibility’ is set to ‘Public’
- Select the ‘Disciplinary Notice’ category.
- Add the user who your doing a case on in the ‘Tags’ section. – Make sure to press enter; otherwise, it won’t save.
- **MOST IMPORTANT**
In the content permissions box, DO NOT TICK ANY BOXES
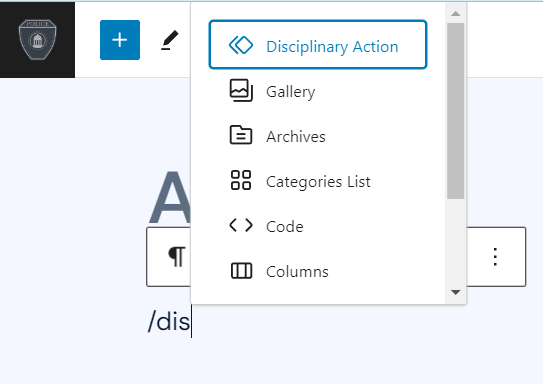
- Where it says ‘Type / to choose a block’
Start typing /case and select ‘Disciplinary Action’ seen to the left. - The template will then show up, and the rest to fill out is self-explanatory.
2.3 – Creating Termination Notices
- Find the button on the left called ‘Posts’.
- Click on the button ‘Add New Post’.
- Rename ‘Add Title’ to the case number with -Termination at the end. e.g Case-0000-Termination.
Or if it isn’t linked to a case, Set the name to ‘[OFFICER] Notice of Termination.’ - Make sure ‘Visibility’ is set to ‘Public’
- Select the ‘Termination Notice’ category.
- Add the user who your doing a case on in the ‘Tags’ section. – Make sure to press enter; otherwise, it won’t save.
- **MOST IMPORTANT**
In the content permissions box, DO NOT TICK ANY BOXES
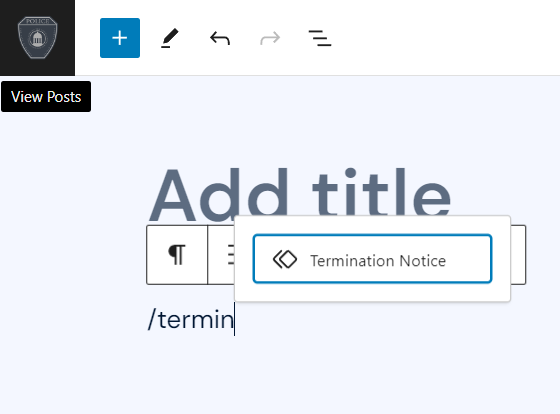
- Where it says ‘Type / to choose a block’
Start typing /case and select ‘Termination Notice’ seen to the left. - The template will then show up, and the rest to fill out is self-explanatory.
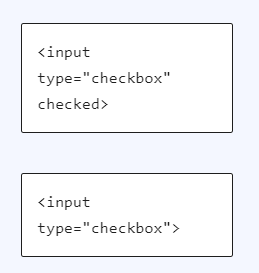
- To make sure the correct checkbox is ticked when the file is complete, on the left side of the options, you will see the following of what’s seen to the left.
- For an item to be ticked, simply add ‘checked’ before the ‘>’.
For an item not to be ticked. Remove ‘checked’